To start the task of removing iron-on patches may seem like a daunting process, but with the right techniques, it can be a straightforward endeavor. Whether you're looking to update your clothing, repurpose an item, or simply refine your style, understanding the proper methods for removing iron-on patches is essential.
This article will explore step-by-step guidelines and share valuable tips to ensure a successful removal process without damaging your garments. Say goodbye to unwanted patches as we delve into the art of effectively and safely eliminating iron-on embellishments.
Table of Contents
The Purpose Behind Removing Iron-on Patches
Beyond a doubt, iron-on patches are considered a versatile means of embellishing garments. But with changing trends of fashion, evolving particular tastes of individuals, or for the repurpose of your uniform or other clothing items, individuals may remove iron-on patches to adapt to the new preferences.
Additionally, you want to change or restore the fabric with a new aesthetic patch. Before you go on to repurpose your garments, you need to understand the methods of removing iron-on patches safely which can update your wardrobes effectively.
Key Insights On Dealing With Iron Patches
- Select a piece of wax paper or a lean fabric to place it over the patch iron over it. Try to remove the patch gently.
- Use a fabric-safe adhesive remover on the gummy area to loosen the glue.
- Lift the stubborn glue which is stuck on the patch portions.
- Apply more Lift more adhesive remover to pluck the residues and then circle it in the washing machine along with 3-4 lids full of white vinegar.
Material Required For Patch Removal
Removing iron-on patches requires specific tools and supplies to ensure a successful and safe process. Here's a list of items you may need:
- Clothing OR Fabric - The item from which you want to remove the iron-on patch.
- Iron - An iron to heat the adhesive on the patch. Make sure to set it to an appropriate temperature for the fabric.
- Parchment Paper OR Thin Fabric - Place parchment paper or a thin fabric over the patch before applying heat. This protects the fabric from direct contact with the iron.
- Seam Ripper or Tweezers- For lifting and removing threads or edges of the patch after it has been heated.
- Adhesive Remover (Optional)- Depending on the type of adhesive used on the patch, an adhesive remover may help clean any residue left on the fabric.
- Clean Cloth OR Rag- To wipe away any residue or excess adhesive after removing the patch.
- Protective Surface - Work on a protected surface, such as an ironing board, to prevent damage to your working area.
- Warm Soapy Water - If the fabric can be washed, warm soapy water can help remove any remaining adhesive after the patch is removed.
Prior Tip: Remember to check the care instructions for the fabric and patch before beginning the removal process to ensure you use the appropriate tools and methods for the specific materials involved.

Effective Methods For Iron-On Patch Removal
There are some solid methods to remove iron on patches that are proven accurate. You can move on to the next method if the previous one doesn’t satisfy you in the removal of iron-on patches.
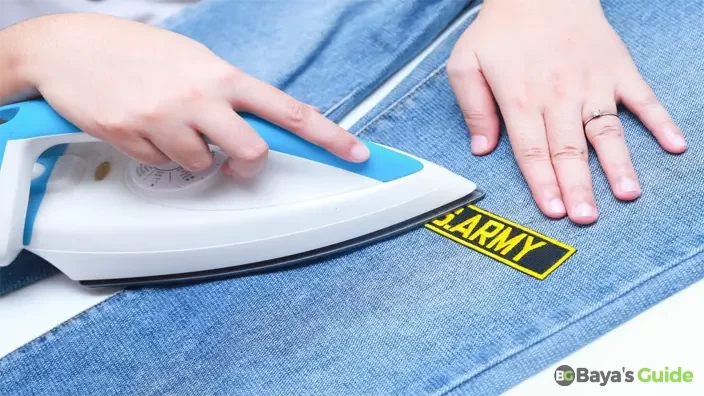
1- Hot Iron Method
To remove an iron-on patch using the hot iron method follow the below guidelines:
- Heat The Iron - Preheat your iron to a high setting without steam.
- Cover With Fabric - Place a thin cloth or fabric over the patch. This acts as a protective barrier.
- Apply Heat - Press the hot iron over the cloth-covered patch for about 15-20 seconds. Ensure consistent pressure.
- Peel Off The Patch - While the patch is still warm, gently peel it off. If it doesn't come off easily, reapply heat for a few more seconds.
- Clean Residue - If there's adhesive residue, you can use an adhesive remover, rubbing alcohol, or acetone on a cloth to clean it off. Test in an inconspicuous area first. Remember, patience is key, and be cautious not to damage the fabric with excessive heat or force.
2- Acetone-Based Nail Polish Remover Method
- Trial In A Hidden Spot - Before applying nail polish remover, test it on a small, inconspicuous area of the fabric to ensure it won't damage or discolor it.
- Apply Nail Polish Remover - Dampen a cloth or cotton ball with nail polish remover. Gently dab the cloth on the patch, focusing on the edges and any residue.
- Let It Soak - Allow the nail polish remover to soak into the patch for a few minutes. This helps to weaken the adhesive.
- Peel Off OR Scrape - Once the patch is softened, try to peel it off gently. If needed, use a plastic scraper or your fingernail to lift the edges.
- Clean Residue - Wipe away any remaining adhesive residue with a cloth soaked in nail polish remover.
- Wash The Fabric - Launder or wash the fabric after removal to eliminate any remaining traces of nail polish remover. Always follow the fabric care instructions and use this method cautiously to avoid damage.
3- Frozen Iron-On Patch Removal Method
Freezing is not a commonly recommended method for removing iron-on patches, but if you want to give it a try:
- Encase In Plastic Bag For Freezing - Seal the item with the iron-on patch in a plastic bag, ensuring it's airtight.
- Freeze Overnight - Put the bag in the freezer and leave it overnight. The cold temperature may make the adhesive on the patch more brittle.
- Remove The Bag From Freezer - Take the item out of the freezer and immediately attempt to peel off the patch while it's still cold.
- Use A Tool If Necessary - If the patch doesn't come off easily, use a plastic scraper or your fingernail to gently lift the edges.
- Clean Residue - If there's any adhesive left, use an adhesive remover or rubbing alcohol on a cloth to clean it off.
Remember that this method might not be as effective as other heat-based methods, and it's important to test in a small, inconspicuous area first to ensure it won't damage the fabric.
4- Hair Dryer Method
- Heat The Patch - Set your hair dryer to the highest heat setting. Direct the hot air onto the iron-on patch for about 30 seconds to 1 minute. Keep the hair dryer a few inches away from the fabric.
- Peel Off Gently - While the patch is still warm, try to peel it off gently. If it doesn't come off easily, reapply heat for a few more seconds.
- Scrape If Needed - If the edges are stubborn, use a plastic scraper or your fingernail to lift them. Be careful not to damage the fabric.
- Clean Residue - If there's any adhesive residue, use an adhesive remover or rubbing alcohol on a cloth to wipe it away.
This method uses heat to soften the adhesive, making it easier to remove the patch. Ensure the fabric can withstand the heat from the hair dryer and be cautious not to overheat or damage the fabric.
5- White Vinegar Soaking Method
- Prepare A Vinegar Solution - Mix equal parts white vinegar and water in a bowl. Ensure the solution is not too strong, as vinegar can sometimes affect colors.
- Soak The Area With Patch - Dip a cloth or sponge into the vinegar solution and apply it to the patch. Ensure the entire patch is thoroughly soaked.
- Let It Sit - Allow the vinegar solution to sit on the patch for at least 15-30 minutes. This helps to weaken the adhesive.
- Peel Off Gently - Attempt to peel off the patch while it's still damp. If it doesn't come off easily, reapply the vinegar solution and wait a bit longer.
- Scrape If Needed - Use a plastic scraper or your fingernail to lift the edges of the patch. Be gentle to avoid damaging the fabric.
- Clean Residue - If there's any remaining adhesive, use an adhesive remover or rubbing alcohol on a cloth to clean it off.
- Wash The Fabric - Launder or wash the fabric after removal to eliminate any lingering vinegar smell. Always test the vinegar solution on a small, inconspicuous area first to ensure it won't harm the fabric. This method might take some time, so patience is key.
6- Warm Water Soaking Method
- Soak The Fabric - Submerge the fabric with the iron-on patch in a basin or sink filled with warm water. Ensure the water is not too hot to avoid damaging the fabric.
- Let It Soak - Allow the fabric to soak for at least 15-30 minutes. This helps to loosen the adhesive on the patch.
- Peel Off Gently - Attempt to peel off the patch while the fabric is still wet. If it doesn't come off easily, continue soaking and try again.
- Scrape If Needed - Use a plastic scraper or your fingernail to lift the edges of the patch. Be gentle to avoid damaging the fabric.
- Clean Residue - If there's any remaining adhesive, use an adhesive remover or rubbing alcohol on a cloth to clean it off.
- Wash The Fabric - Launder or wash the fabric after removal to ensure any adhesive residue or soaking solution is completely removed.
You Might Be Interested: How To Measure Reach
Remove Iron-On Patches From Woolen Clothes Using Cold Water
Removing iron-on patches from woolen fabric with cold water requires a gentle approach. Here's a step-by-step guide:
- Spot Test Before Proceeding - Before proceeding, test the cold water method in a small, inconspicuous area to ensure it won't damage or discolor the wool.
- Dampen the Area - Moisten the iron-on patch and the surrounding area with cold water. Use a sponge or cloth to apply the water gently.
- Wait For Moisture Absorption - Allow the cold water to be absorbed by the patch for a few minutes. This helps to loosen the adhesive.
- Peel Off Gently - Attempt to peel off the patch while it's damp. Be patient; if it doesn't come off easily, reapply cold water and wait a bit longer.
- Scrape If Needed - Use a plastic scraper or your fingernail to lift the edges of the patch. Be careful not to damage the wool fibers.
- Clean Residue - If there's any remaining adhesive, use a mild detergent or wool-safe cleaning solution on a damp cloth to clean it off. Avoid using harsh chemicals.
- Air Dry - Allow the woolen fabric to air dry completely. Avoid using heat, as it can potentially set any remaining adhesive.
Remember, wool is a delicate fabric, and it's crucial to be gentle during the process. If you're uncertain, consider seeking professional advice or testing the method on a small, inconspicuous area first.
Removing Iron-On Patch Residue: Helpful Tips
Explore these handy tips to effectively remove iron-on patch residue from your clothes, ensuring a seamless transformation without damage or discoloration.
- Adhesive Remover - Use a commercial adhesive remover or Goo Gone to dissolve and lift the residue. Apply according to the product instructions and wipe away with a clean cloth.
- Rubbing Alcohol OR Acetone - Dampen a cloth with rubbing alcohol or acetone and gently rub the residue. Test in a small, inconspicuous area first to ensure it won't damage the fabric.
- Warm Soapy Water - Create a solution of warm water and mild dish soap. Dampen a cloth and gently rub the residue. This method is gentle and suitable for many fabrics.
- White Vinegar - Make a solution of equal parts white vinegar and water. Apply with a cloth, let it sit briefly, and then rub the residue away. Rinse the fabric afterward.
- Heat & Peel - If the fabric can tolerate heat, use a hair dryer or warm iron to soften the residue, then peel it off gently. Clean any remaining residue with one of the above methods.
- Patience & Repeated Attempts - Sometimes, removing residue may require multiple attempts. Be patient and try different methods until the residue is completely gone.
- Avoid Abrasive Tools - Refrain from using abrasive tools that might damage the fabric. Opt for soft cloths or plastic scrapers.
Always test any cleaning solution or method on a small, inconspicuous area first to ensure it won't harm the fabric.
Frequently Asked Questions
Is It Possible To Remove Iron-On Patches By Washing?
Yes, if you wash your iron on patched fabric in a gentle circle in the washing machine adding cold water is more effective. Don’t circle your iron on patched clothing on a high-speed spin cycle to deplete the patches. Moreover, never use fabric softeners or bleach for patches to fall off to shield your jersey or soft fabric clothes from severe damage.
Do Iron-On Patches Easily Peel Away?
Iron-on patches can peel off over time due to wear, washing, or exposure to various elements. The longevity of the adhesion depends on factors such as the quality of the patch, the fabric it's applied to, and how well it was initially attached.
If you notice an iron-on patch peeling, you might consider reapplying it or using one of the removal methods mentioned earlier to take it off before applying a new one. Keep in mind that the lifespan of iron-on patches can vary, and factors like the frequency of washing, the type of fabric, and the overall care of the garment can influence how well the patch adheres.
Can Iron-On Patches Be Removed Using Steam?
Whatever the heat level may be, never use the steam when you are using it to peel off the patches. The hot water stops the proper formation of fabric, rather you can use a dry iron, or hair dryer to pull out the patches of glue.
Conclusion
In conclusion, removing iron-on patches can be a straightforward process with the right techniques and care. Whether you're seeking to replace a patch, change the design, or simply refresh your garment. Address any remaining adhesive residue with appropriate solutions, keeping in mind the fabric's sensitivity.
Remember, the effectiveness of each method can vary depending on the type of fabric, the quality of the patch, and how well it was initially applied. By approaching the removal process with caution and using the right techniques, you can refresh your garment and prepare it for a new patch or a different design.