A Derma Roller is a popular cosmetic skincare tool that promotes collagen production and enhances the absorption of skincare products. To ensure its effectiveness and prevent infection, regular cleaning is essential. It deeply cleans your skin while treating acne and blemishing. You need to sterilize your roller by striking hydrogen peroxide or alcohol, soap, and purifying tablets to clean your device. Be patient, it takes time but is not a difficult task to perform.
Here's a step-by-step guide on how to clean a derma roller:
- Before You Begin: Gather Supplies
- Isopropyl alcohol (at least 70% concentration)
- Small bowl or cup
- Tweezers
- Clean paper towel
- Running water
Table of Contents
- Step-By-Step Guide For Cleaning Derma Roller
- Step 1: Prepare A Cleaning Solution
- Step 2: Disassemble The Derma Roller
- Step 3: Soak The Roller Heads
- Step 4: Gently Clean The Roller
- Step 5: Rinse Thoroughly
- Step 6: Air Dry Completely
- Step 7: Reassemble The Derma Roller & Store It Properly
- Step 8: Frequency Of Cleaning
- Step 9: Replace Roller Heads Regularly
- Denture Tablets For Roller Hygiene
- How To Prepare My Skin For A Derma Roller?
- Post-Rolling Care For Skin
- Frequently Asked Questions
- Conclusion
Step-By-Step Guide For Cleaning Derma Roller
Step 1: Prepare A Cleaning Solution
Fill the small bowl or cup with enough Isopropyl alcohol to submerge the derma roller. Pour your bowl with 60-90% hydrogen peroxide or you may use alcohol if you don’t have the former liquid in a quantity that can cover the derma device completely. If your Isopropyl alcohol is not up to the level of the Derma Roller, it can not be sanitized properly. It’s better to avail a ceramic dish or a plastic Tupperware holder.
Step 2: Disassemble The Derma Roller
If your Derma Roller has detachable roller heads, carefully remove them using tweezers. This allows for more thorough cleaning.
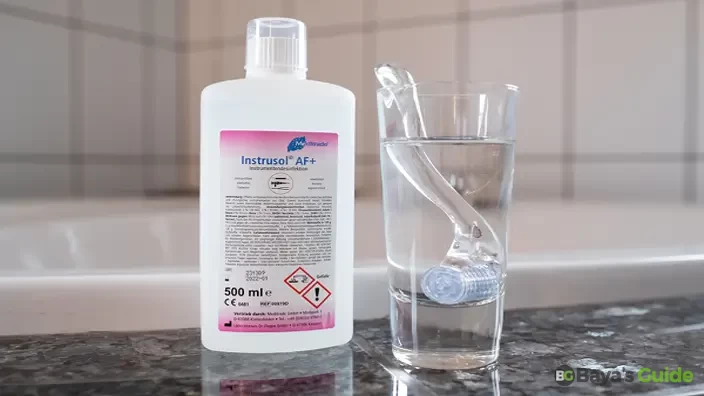
Step 3: Soak The Roller Heads
Make sure to submerge the roller heads in the Isopropyl alcohol for about 10-15 minutes. Keep the roller in the bowl with the position of upside down. Keep the needles of the roller upward. This helps to disinfect and break down any residue.
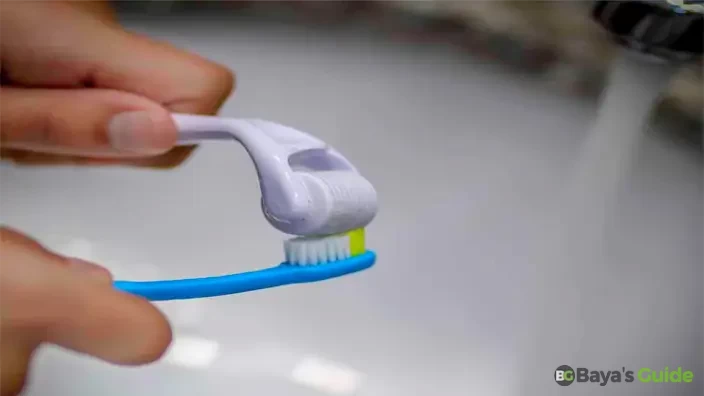
Step 4: Gently Clean The Roller
Use tweezers to hold the roller, and with a soft brush or an old toothbrush, gently scrub the roller surface. When you notice your derma roller soaks in the mixture of alcohol or peroxide and let the particles wash away. Pay attention to the needles, ensuring there's no debris or skincare product residue.
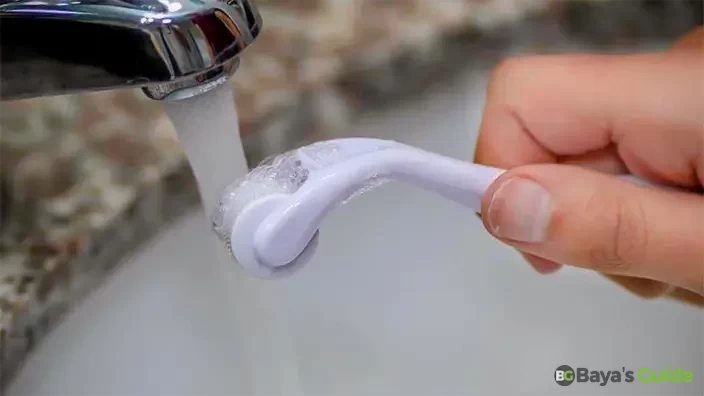
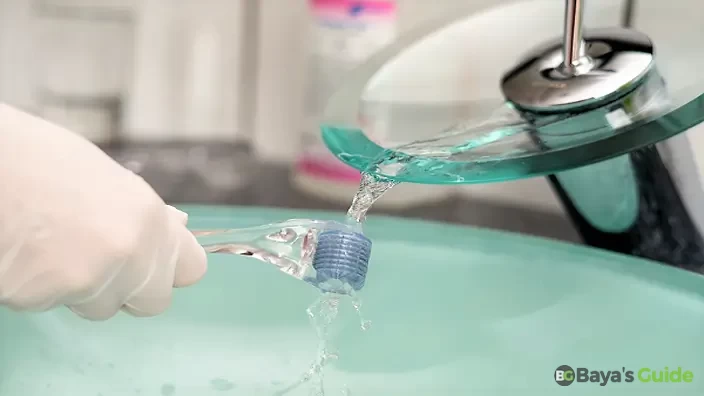
Step 5: Rinse Thoroughly
After scrubbing, rinse the roller heads under running water to remove any remaining alcohol or debris. Be cautious not to damage the needles during this process. Make sure, it will be germ-free completely.
Step 6: Air Dry Completely
After sanitizing the derma roller, place its heads on a clean paper towel for 10-20 minutes and let the air dry completely. Avoid using cloth or tissues that may leave fibers on the roller. Remember, the air-drying method supreme method of drying the roller as the threads of the towel are captured in the needles of the derma roller.
Step 7: Reassemble The Derma Roller & Store It Properly
Once dry, carefully reattach the roller heads to the derma roller. To keep it in the best form, store the clean and dry derma roller and bolt its lid. Furthermore, avoid leaving it exposed to prevent contamination.
Step 8: Frequency Of Cleaning
Clean your derma roller after each use to maintain hygiene. Additionally, disinfect it before the first use, even if it's brand new.
Step 9: Replace Roller Heads Regularly
Over time, derma roller needles can become dull. Replace roller heads periodically or according to the manufacturer's recommendations.
Explore More: How To Identify A Raw Diamond
Denture Tablets For Roller Hygiene
The purifying tablets which are very effective in cleaning the derma roller are manufactured and sold by the companies themselves. Before applying these tablets, you need to read the detailed instructions thoroughly labeled on the packaging. If you haven’t found the cleaning tablet with your derma roller, you can use denture tablets with full satisfaction. These tablets are designed to clean and sanitize your derma roller safely.
1- Follow The Outlined Instructions
Many types of cleaning tablets are available in the market. They come with different instructions and guides about varying water levels. The average amount of water should be about 1 c (240 mL) typically. After measuring water in the measuring cup, pour it down into a bowl. Dip the derma roller in the sanitizing water for about 5-10 minutes. Make sure water should be in the filling line of the container.
2- Quantity Of Tablets In Your Container
In an average container filled with water, one tablet is sufficient the cablet's chemicals start mixing in the water as soon as you dunk that purifying tablet in the water- it creates the best sanitization solution that is an effective cleaning for your derma roller. Soon after that, place your derma roller in the solution for 5-10 minutes. Make sure the water in the container covers the device completely.
Note: In case the denture cleaning tablets are being used in the cleansing solution, it’s better to soak the derma roller in the container of solution overnight.
3- Rinse Your Roller In Warm Water
Don’t put your roller under steam to dry it after taking it out directly of the solution. Wash it with warm water so that the solution will be rinsed off properly. Then, put your Derma Roller under the steam to dry it. The threads or fibers stay in the needles of the roller when you want to dry it with a paper towel or tissue paper and they can scratch your face next time.
4- Roll Your Roller Over A Wet Sponge
After washing it to your satisfaction, you need to place it on the flat top of the sponge. Keep putting it upside down for 20-45 seconds to get away the dregs and residue which can not be removed with any other method except it. After each use, use a new sponge to avoid your face getting contaminated.
5- Place It In The Air Dry
Take warm water from the faucet and wash the derma roller till all the dirt, blood, and skin cells get loosened and rinsed off. Then, let it dry in the hot steam. It will be dry within 10-20 minutes.
How To Prepare My Skin For A Derma Roller?
Preparing your skin for a derma roller session is crucial to ensure a safe and effective experience. Here's a step-by-step guide on how to prepare your skin:
1- Cleanse Your Skin
Always start with a gentle cleanser to remove any makeup, dirt, or impurities from your face. This ensures a clean canvas for the derma roller.
2- Pat Dry
Gently pat your skin dry with a clean towel. Avoid rubbing, as freshly cleansed skin can be more sensitive.
3- Disinfect The Derma Roller
Before every use, disinfect the derma roller by soaking it in isopropyl alcohol for 10-15 minutes. This helps eliminate bacteria and ensures a sterile application.
4- Choose The Right Needle Length
Select an appropriate needle length based on your skincare goals. Shorter needles (0.25mm to 0.5mm) are suitable for more frequent use, while longer needles (0.75mm and above) may require longer intervals between sessions.
5- Perform A Patch Test
If you're using a new derma roller or have recently changed the needle length, consider doing a patch test on a small area to ensure your skin reacts well without excessive irritation.
6- Numb The Skin (Optional)
If you find derma rolling uncomfortable, you can use a numbing cream containing lidocaine. Apply it to the target area and follow the product's instructions for usage.
Applying a hydrating serum with ingredients like hyaluronic acid can enhance the derma roller's effectiveness. The serum helps the roller glide smoothly and promotes better absorption.
8- Start Rolling
Divide your face into sections and roll each area vertically, horizontally, and diagonally. Avoid the eye area and areas with active breakouts. Apply gentle pressure; there's no need to press hard.
Post-Rolling Care For Skin
After derma rolling, apply a soothing and hydrating serum to calm the skin. Avoid products with harsh chemicals or strong active ingredients immediately after rolling.
1- Apply Sunscreen
Always finish with a broad-spectrum sunscreen, especially if you derma roll in the morning. Micro-needling makes your skin more sensitive to the sun, so protecting it is crucial.
2- Clean & Store The Derma Roller
After use, clean the derma roller following the recommended steps. Store it in a clean, dry place to maintain its hygiene.
Remember, consistency is key with derma rolling. Follow a routine that works for your skin type and concerns and consult with a dermatologist if you have any doubts or concerns about incorporating a derma roller into your skincare regimen.
Frequently Asked Questions
How Often Should I Clean My Derma Roller?
Reading about the variance methods of cleaning your Derma roller, one question constantly keeps on revolving in your mind whether we should clean our roller after each use. Yes, absolutely. When you apply the derma roller on your face for face cleansing, there is a huge amount of dirt, hair, blood, and skin dead cells get stuck in your roller. It’s great to soak it in alcohol so that the bacteria that are stored in the needles of the roller can be easily eliminated.
Can I Boil My Derma Roller To Sterilize It?
No, it is extremely detrimental to boil your derma roller as it can burn to bend the needles. After getting damaged, the device becomes completely useless. Furthermore, boiling can wash the device only but can’t sterilize it and make it germ-free entirely.
Can I Clean My DermaRoller With Vinegar?
It’s heard from most of the people who wash their Derma rollers in vinegar. But no, it’s as dangerous as boiling water. Vinegar is a blender of acetic acids that can kill the germs but at the same time, it can pierce your tender skin. Vinegar may be okay for other types of materials, but this solution is not effective for your skin.
Conclusion
By following these steps, you can keep your derma roller clean and in optimal condition for safe and effective skincare. Regular cleaning not only extends the life of the tool but also ensures that you reap the maximum benefits without risking skin irritation or infection.