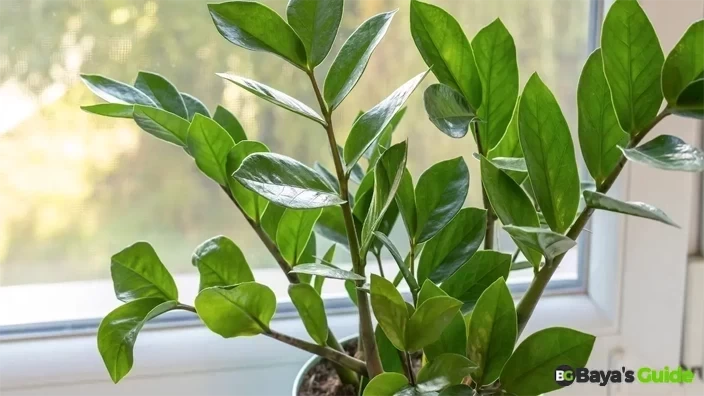
Are you a Green Family growing fan? ZZ plant propagation is a wonderful process that enables you to bestow multiple plants on yourself without any hassle. If you have felt mesmerized by the slick, dark green leaves of the ZZ plant (Zamioculcas Zamiifolia) at some point, you are not alone. This is the beauty that has become the go-to option for many homes, adding some touch of nature to the indoors.
ZZ Plants, known for their toughness and beginner-friendly care, is a hot favorite among houseplant enthusiasts. Do you want to learn how to make more ZZ Plants? Well, you’re in luck. In this article, I will share three propagation methods with step-by-step instructions to help you expand your ZZ Plant collection.
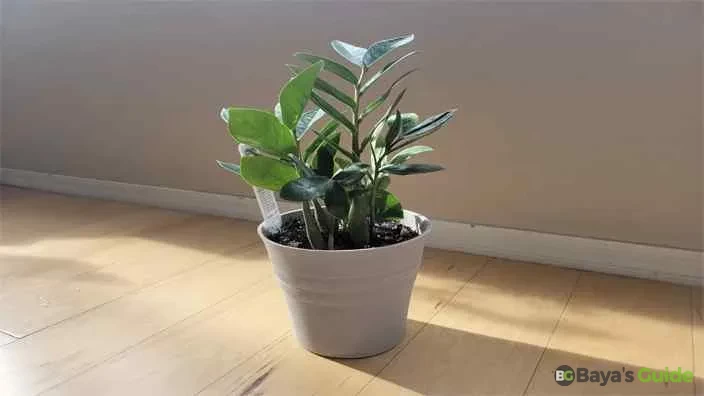
Table of Contents
- Ways To Propagate ZZ Plant
- Steps To Propagate ZZ Plant From Stem
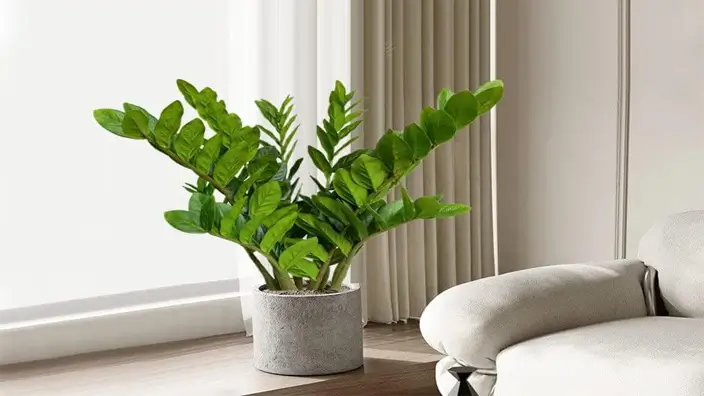
- Artificial ZZ Indoor 17" Plant In Ceramic Pot Fake Potted Zamioculcas Silk Plant For Home Table Decor Bedroom Aesthetic
- Steps To Propagate ZZ Plant From Leaf
- Steps To Propagate ZZ Plant By Division
- Artificial Plants Real Touch Faux ZZ Plant Stems - Pack Of 10 (Green) For Home & Office Aesthetic Decor Indoor/Outdoor Houseplant
- Frequently Asked Questions
- Conclusion
Ways To Propagate ZZ Plant
Explore three effective plant propagation methods for propagating new plants into a mature plant. They include stem cuttings, multiple leaf cuttings, and division. Will your ZZ plant grow just the way you like? Yes, By using them, you will be successful in getting the desired results. Each simple and rewarding process comes with its unique steps, and our detailed guide will walk you through the propagation process for each technique.
Propagate ZZ Plant From Stem
Below, we have discussed the step-by-step process for propagating ZZ plants from the stem, ensuring successful growth and multiplication of your green companions.
Step 1: Choose A Healthy Stem
Using a stem cutting from a new plant will speed up the propagation process. Stem cuttings are great for ZZ Plant propagation because they come with everything needed to kickstart new roots and shoots. They’ve got nodes like growth hubs where roots and leaves can sprout.
Besides, they pack auxin, a plant hormone, to boost root growth. That’s why stem cuttings are the way to go when multiplying ZZ plants. Start with picking up a nice, healthy stem of the ZZ plant. When choosing it for propagation, look for five factors:
- Overall Look - When picking from the plant, choose one that’s been around for at least a year. Also, look for stems with lots of shiny and deep green leaves. If it’s all about balance, you might want to take two cuttings from each side to keep it looking good.
- Health - Stay away from stems with yellow or brown leaves or any spots that look sick because those issues can spread up to the new growth.
- Length - Go for a stem that’s at least 4 inches long. That gives it the space it needs to grow roots and new shoots.
- Thickness - Make sure the stem is nice and thick, at least a quarter of an inch thick. This thickness helps the cutting stand tall and grow roots faster.
- Cutting - Pick a spot for cutting, hidden behind other leaves so it’s not too obvious.
As a rule, don’t go for stems too close to the bottom; they might be too tough to root. And if a stem’s got flowers, pass it up – the plant is putting its energy into making blossoms, not roots.
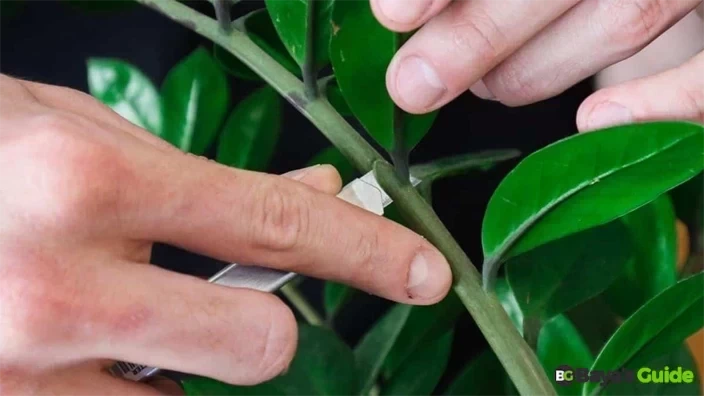
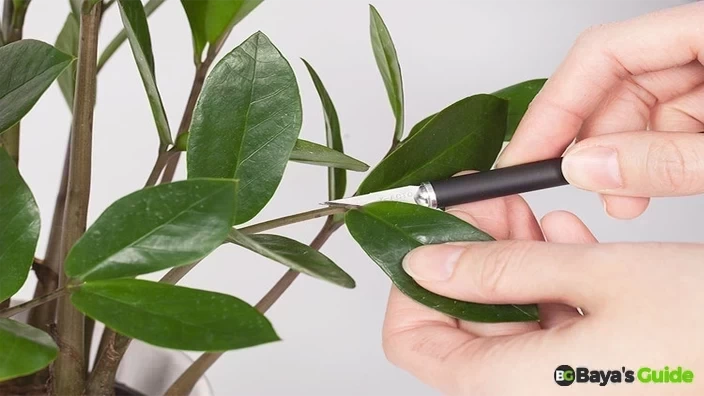
Step 2: Cut The Stem
Now that you’ve chosen a stem or stems get a sharp knife or a pair of pruning shears. Make sure to clean and disinfect your tools. If they’ve been used before, they could carry bacteria that can infect your new cutting and the parent plant. A clean, precise cut around a 45-degree angle will help the plant recover faster.
When snipping the stem, take off a few inches from the end, or just get rid of the whole stem in one go. Remember that it’s not growing back once you cut it, so your plant will look neater if you remove the entire stem.
Remove the leaves from the bottom of the stem to prevent them from rotting in the water or soil. Next, slice them into sections; each should be at least 4 inches long.
Step 3: Rooting In Soil Or Water
If you’re going for rooting in water, simply stick the cut end of the stem into a glass of water with the leaves hanging out. The glass should be tall enough to support the cuttings upright. Ensure the glass is clean before filling it up to avoid any bacterial stuff. Put the glass in a spot with good, indirect light.
Remember to top up the water every few days and completely change it once a week; if you’re more into rooting in the soil, plant that cut end into a pot filled with a well-draining potting mix. A mix of coconut coir and perlite in equal parts should do the trick.
This combo lets water drain away to prevent over-soaking while keeping things moist enough for the rhizome (thick, tuber-like underground stems) and roots to grow. Stick your finger in the soil to make a few drainage holes, then pop in the cutting or a bunch of them if you’ve trimmed a few.
Give them a gentle press to secure the stems and remove air pockets. Then, move the pot to a bright spot with plenty of indirect light. Keep the soil nicely damp but not soaking wet.
Using soil might take more patience, but it helps develop robust roots that can handle the shock of being transplanted.
Step 4: Transplanting The Stems
When your cutting has grown roots about an inch or two long, which usually takes a few months, it’s time to move it to a bigger pot.
Get a larger pot and fill it with the same mixture of soil I’ve mentioned in Step 2. Use the same method as well to transplant the stem cuttings.
Steps To Propagate ZZ Plant From Stem
Steps | Descriptions |
| Choose A Healthy Stem | Select a robust ZZ Plant stem with shiny green leaves, at least a year old, free from yellow or brown leaves, and at least 4 inches long; avoid stems with flowers. |
| Cut The Stem | Use clean, disinfected tools for a precise 45-degree angle cut, removing a few inches or the entire stem; remove bottom leaves to prevent rot and slice into sections. |
| Rooting In Soil Or Water | For water rooting, place the cut end in a tall, clean glass with water, ensuring good light; for soil rooting, plant in a well-draining mix, making drainage holes and keeping the soil damp. |
| Transplanting The Stems | After roots grow 1-2 inches, transplant into a larger pot with the same soil mix, following the same process as initial planting for continued ZZ Plant growth. |
You Might Also Like:How To Charge Rose Quartz
Artificial ZZ Indoor 17" Plant In Ceramic Pot Fake Potted Zamioculcas Silk Plant For Home Table Decor Bedroom Aesthetic
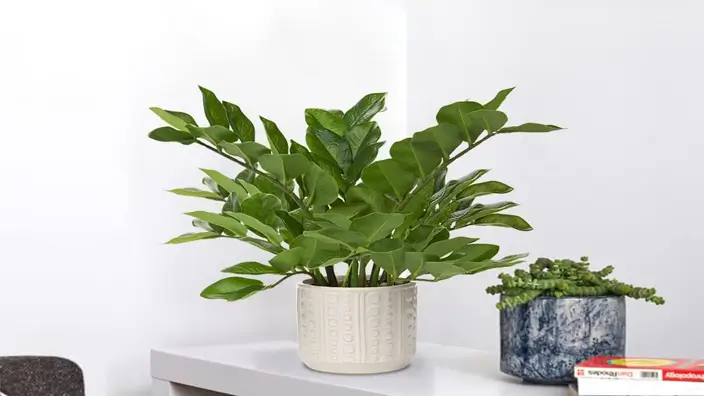
About This Item
- Lush Appearance & Real Touch ZZ Plant: Bring lifelike greenery into your home with a ceramic pot.
- Eco-Friendly Plastic Plants: Safe for kids and pets. No squeezing or assembly is required.
- Maintenance Free: No watering or sunlight is needed for long-lasting freshness.
- Wide Applications: Perfect for indoor or outdoor decoration, ideal for gifting.
- Dimension Of Artificial House Plant: The plant measures approx. 17" (pot approx. 5.9" x 5.6").
Propagate ZZ Plant From Leaf
Another popular way to propagate, in addition to the ZZ plant cutting, is from leaf cuttings. Simply take a good chunk of the leaf’s stem and the leaf itself. It can grow into its own rhizome and become a full-fledged plant. Here's what you must do:
Step 1: Cut The Leaves
Pick a nice, healthy leaf from your ZZ plant from the main stem with the knife. Slice it off at the base, as close to the stem as possible. But you’ve also got to make sure there’s a piece of the stem attached to the leaf for that new rhizome to form.
You can do this with a single leaf, but remember that the leaf propagation isn’t as reliable for rooting, so it’s better to pick a few at once. After you’ve cut it, give the end of the leaf some time, maybe a few hours, to toughen up. This helps avoid any rot issues down the line.
Step 2: Rooting The Leaves
Propagating ZZ plants in water for leaves requires careful attention to water levels. Maintain a low water level, covering at least an inch of the leaf's end to prevent contact with the central part. Choose a slender glass to prevent leaves from flopping over, place it in soft light, and regularly replace the water. After a few weeks, when roots are at least an inch long, transfer the leaf to a small pot with a well-draining potting mix.
For soil propagation, use the same mixture discussed earlier for stem cuttings. Fill a tray with the mix, water it, and insert leaves upright into the soil, leaving most exposed. Place the tray in a warm, well-lit spot, ensuring the leaves don't tip over. In optimal conditions (around 27°C), you might see new rhizomes sprouting in about four weeks, but in regular indoor temperatures, it could take up to nine months.
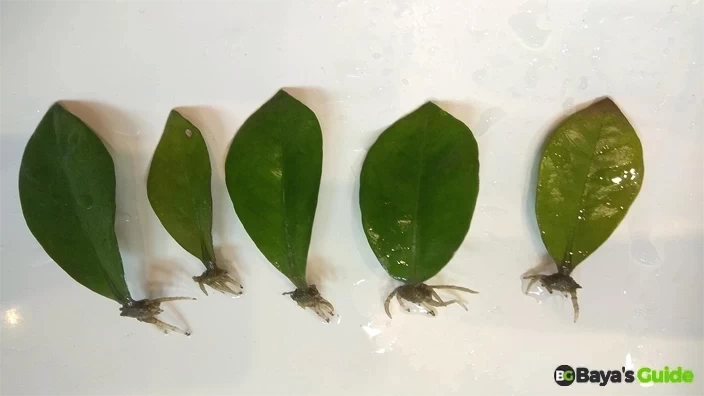
Step 3: Transplanting The Leaves
Once you spot the rhizomes growing enough roots (to avoid shock), you can move the leaves into a larger pot where they have more room to stretch out.
Steps To Propagate ZZ Plant From Leaf
Steps | Details |
| Cut off the Leaves | Cut a healthy ZZ plant leaf from the main stem, ensuring that a stem is left on, and let the leaf toughen up for a few hours to keep rot away. |
| Root The Leaves | Ensure not to overwater, root propagation, cover the leaf's ends, and transfer to soil once the roots are at least one inch long. For soil propagation, use a mix that drains well and wait until new rhizomes sprout, which may take up to nine months. |
| Transplanting Into Leaves | Move the rhizomes into larger pots to give the leaves more room, but mind shock. |
Propagate ZZ Plant By Division
There’s also an easy way to propagate the ZZ plant: by taking out sections from the plant. This prevents overcrowding in the pot and gives the plants more room to stretch their roots within the pot. However, this method only works for mature plants. Here’s how to propagate the plant by division:
Step 1: Take Out The Plant
Start by getting that plant out of its current pot. Wait a couple of days before doing this without watering; it’ll make the removal process smoother. If your ZZ plant’s roots are all tangled up, and it’s hard to separate them, try taking it out of the pot and gently using your fingers to pull the rhizomes apart.
Step 2: Cut The Plant Into Sections
With your knife, gently split the plant into two or more parts. Each chunk should have at least two rhizomes and a handful of roots. Don’t forget to clean your knife before you do this thoroughly – it stops any disease from spreading. But if you’re dealing with a big ZZ plant, you might need to bring in a saw to slice through those rhizomes.
Step 3: Repotting The Plant Sections
Fill as many pots as there are sections of the plant with a houseplant potting mix. Plant each division by adding soil (until about an inch or two below the pot’s top) and placing each section inside the pots. Give the base a gentle press to secure the plant, then water thoroughly. Leave these new pots in a spot with indirect light, and keep up with the watering.
Steps To Propagate ZZ Plant By Division
Steps | Details |
| Take Out The Plant | Gently remove the ZZ plant from its pot after a few days without water to ease the process, and carefully separate tangled roots if needed. |
| Cut The Plant Into Sections | Use a clean knife to split the ZZ plant into sections, ensuring each part has at least two rhizomes and roots. For larger plants, a saw may be necessary. |
| Repotting The Plant Sections | Fill pots with a houseplant potting mix, plant each divided section, press the base gently, water thoroughly, and place in indirect light for new growth, maintaining regular watering. |
Artificial Plants Real Touch Faux ZZ Plant Stems - Pack Of 10 (Green) For Home & Office Aesthetic Decor Indoor/Outdoor Houseplant
Product Description
- Introducing ZZ Plant: ZZ Plant, also known as Zamioculas Zamiifolia, is an attractive tropical indoor plant. Its smooth, glossy leaves begin as bright green and mature into a captivating emerald hue. You can now easily bring this lifelike beauty into your space with our products.
- Specifications: This set includes 10 ZZ plant stems in various sizes (Extra Small: 20" x 3, Small: 24" x 2, Medium: 26" x 2, Large: 26" x 2), each featuring multiple pairs of glossy leaves. Please note that pots or vases are not included.
- Materials: Crafted from high-quality fabric and plastic, our Faux ZZ Plant Stems are sturdy, durable, lightweight, and odorless. They offer a realistic look and a natural feel. The flexible iron wire stems are wrapped with plastic, allowing you to bend or trim them as needed for your artificial floral arrangements.
- Versatile Decor: These artificial green plants are suitable for both indoor and outdoor decorating. They make excellent additions to your office desk, entryway, windowsill, home garden, shelf, bathroom, or for special occasions like weddings and Christmas events. They also make a wonderful gift for greenery enthusiasts.
- Low-Maintenance: Forget about the hassle of watering and sunlight. Our artificial greenery remains vibrant and fresh for years without any special care. You can place them in dimly lit areas, go on vacation, or simply leave them unattended—these fake indoor plants are the perfect solution for those with plant allergies and pet-friendly homes.
Frequently Asked Questions
Is It Better To Propagate ZZ In Water Or Soil?
Whether it’s better to propagate ZZ plants in water or soil depends on your preference and patience. Water propagation can be visually appealing as you watch roots develop, but it may take longer and result in a less robust plant. Soil propagation often leads to faster and more resilient growth since the plant is already accustomed to soil. It’s a personal choice, but many gardeners prefer soil for better results.
Can I Propagate A ZZ Plant In Water?
Yes, you can propagate a ZZ plant in water. It involves placing stem or leaf cuttings in water until they develop roots, which can then be transferred to soil.
How Can I Propagate ZZ Plants At Home?
To propagate ZZ plants at home, select a healthy stem cutting or leaf with at least an inch of the petiole attached. Root the cutting in either water or soil, following the steps outlined earlier. Ensure the plant has adequate indirect light and moderate watering to support root and shoot development.
How Can I Make My ZZ Plant Propagate Faster?
For faster ZZ plant propagation, create ideal conditions. Aim for a consistent 27°C temperature, maintain indirect light and water appropriately, avoiding overhydration or drought stress. Consider using a rooting hormone to stimulate root growth. Lastly, choose healthy cuttings and ensure they have optimal conditions to accelerate propagation.
Can I Grow A ZZ Plant From A Leaf?
Yes, you can grow a ZZ plant from a leaf. Take a healthy ZZ plant leaf, allow the cut end to callous for a few hours, and place it in a well-draining potting mix or water. With time and proper care, the leaf can develop roots and eventually grow into a new ZZ plant.
Conclusion
Thus, you've learned each propagation method for successfully propagating ZZ plants. Avoiding incorrect propagation techniques is crucial to prevent issues like rotting or infection. Seeking visual guidance on YouTube for "how to propagate ZZ plant" can provide a practical approach. With the right skills and knowledge, multiplying your ZZ plants becomes a straightforward process.