Have you ever wanted to take a simple piece of wood and turn it into something that will be used as an art piece? You wish to go on a journey in the woodcarving world! Hence, let your imagination run wild. Suppose you are gifted with an extraordinary item that can make a dreary piece of wood into a vibrant animal or a simple design into something cool. In other words, that's what wooden carvings are about, and it's not as difficult as you might think.
You need to get some wood and maybe get a carving kit – those must be cool instruments, then. Think of it as a drawing artist's workshop where you can find the most useful equipment. After that, you have to learn some useful wood carving tips on how to wood carve, which I will show you here.
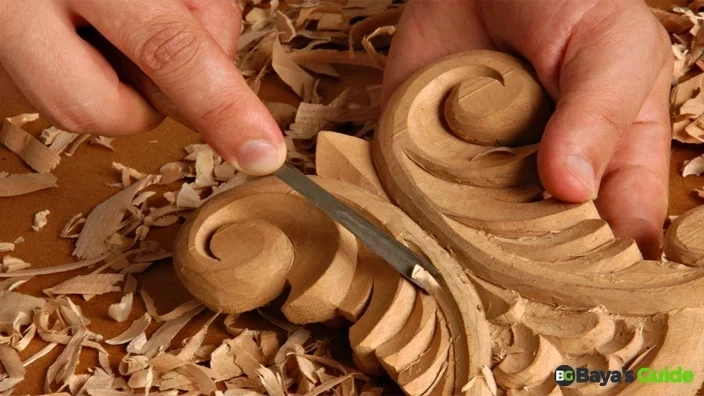
Table of Contents
- How To Wood Carve - Step-By-Step Guide
- Step 1: Exploring Different Wood Carving Styles
- Step 2: Choosing The Right Kind Of Wood
- Step 3: Choosing The Right Tools
- Step 4: Ensuring Safety Measures
- Step 5: Beginning The Practice
- Step 6: Sketching The Design
- Step 7: Make Sure The Wood Is Secure & Stable
- Step 8: Start Slowly & Make A Rough Texture
- Step 9: Carve The Form
- Step 10: Adding Details
- Step 11: Finishing & Polishing
- Ways To Craft Wood Carve Like A Pro
- Frequently Asked Questions
- Conclusion
How To Wood Carve - Step-By-Step Guide
Step 1: Exploring Different Wood Carving Styles
Wood carving is an old art that has evolved and expanded throughout the centuries. There are many wood carving styles, but they can be classified into four major categories.
1- Whittling
It is an old carving style that primarily uses a stiff-handled sharp knife and leaves behind a sharp and angular stroke for small three-dimensional spaces. The resulting structure is usually small but in 3D shape.
2- Carving
In this carving style, figures are etched into a flat wooden panel, giving a 3-dimensional image from the front while the back remains untouched and plain.
3- Round Carving
It is the third and probably most life-like technique. A variety of tools are used in this technique to carve a three-dimensional sculpture that has soft and natural lines.
4- Chip Carving
This is a technique that relies on knives, chisels, and hammers. In this carving technique, you chip away the wood little by little to create patterns on the front of the board while the back remains flat.
Each of these styles has further classifications and categories that can be explored in depth. Once you become a professional carver, you combine multiple styles and generate one for your own.
Step 2: Choosing The Right Kind Of Wood
The right choice of wood is essential when carving wood. Without proper knowledge, you won’t be able to make the right choice. The more challenging it is to carve a piece of wood, the more exquisite results you will get from it. However, that doesn’t mean the wood will be easy for a beginner.
If you are a beginner, you should go for softer varieties like Basswood, Butternut, and White Pines that are easier to carve and more forgiving. After you gain some experience and are sure of your skills, you can switch to medium woods like Mahogany and Black Walnut, which are slightly more challenging but yield rewarding structures. For professional wood carvers who want to really challenge themselves and carve out a masterpiece with enticing and bewitching details, Cherry, Sugar Maple, and Oak are ideal choices. They are very hard to carve because of their hardness, but when successfully carved, they produce the finest pieces.
You Might Be Interested:How To Shade A Tattoo
While this is just a short intro to these woods, it gives you a general idea of what kind of wood you need to select based on the difficulty level you currently can handle. As you become more skilled, you can go for tougher woods.
Step 3: Choosing The Right Tools
Just like wood, the choice of woodcarving tools is also crucial. These three aspects are interrelated. You will choose wood and power tools based on the carving style you are following and vice versa. There are 3 kinds of tools you have to select: knives, gouges, and chisels. However, it is essential to make your wood carving tools sharp to get the desired results.
I always recommend purchasing proper carving gear that is specially crafted for the said purpose. These tools are sharp, easy to grip, and durable. They will last for a much longer time compared to the alternatives. You should not opt for utility tools or pocket knives as they won’t be effective and will also not be comfortable to hold while carving. As an alternative to knives, you can use a chip carving knife, pocket knife, or utility knife temporarily, but it won’t have the same effect.
There are several gouges you need to obtain if you want to take the hobby or profession of carving seriously. The two gouges that you must get are U-gouges and V-gouges. You should also get bent and spoon gouges, but their use will be less frequent and specialized. Keeping them in your arsenal will help you in your professional projects later on.
Chisels are also needed for wood chipping in conjunction with mallets. There are basic and skewed chisels that are used. Traditional mallets were made of heavy wood, but nowadays, carpenters use rubber mallets as they are quieter and cause less damage to the chisel handle.
Step 4: Ensuring Safety Measures
Remember, you must always ensure that the tools have been properly sharpened. For safety measures, always cut away from your body and never go towards it, for obvious reasons. You must keep your hands behind the tool’s edge and never in front of it. Always remember that knives and gouges can slip while cutting, and if your hand or body is in front of them, they can result in a serious injury. To prevent the wood from splintering, you must always cut along the grain instead of cutting against it. Always carve along the lines of grain and in a downward direction. If your tool is sharp but the wood still tears when working, then you might be carving in the wrong direction.
Step 5: Beginning The Practice
Now that you have selected the right wood, tools, and carving style, it is time to begin the process. But wait, before you begin working on your delicate project, it’s better to practice on a bit of scrap wood to ensure everything is on point. Practicing on scrap will give you the opportunity to become familiar with the tools and the cutting technique. You can practice as much as you want, and when you feel ready, you can move on to the real piece.
As you are practicing, learn to make a few of the basic cuts in the beginning. You will learn more complex cuts later on. The running cut is the easiest, also known as a long channel that is made on the surface of the wood in a long line form. The stabbing cuts require more precision as they create sharp carvings in the wood. Sweep cuts are also simple but require a precise angle of rotation as you create arc shapes into the wood.
Step 6: Sketching The Design
As a beginner, accuracy matters a lot. You won’t be able to carve out a masterpiece on your first attempt, but you can make it as good as possible by drawing out the design first. Instead of keeping the design in your mind, use a pencil to create a light sketch where you will be making cuts and gouges. This sketch will act as a guide and will help you maintain a higher precision when working on the tool. Remember, from this point onwards, there is no room for mistakes. If you make a mistake, you will have to start over again with a new piece of wood.
Step 7: Make Sure The Wood Is Secure & Stable
Before you begin the carving process, make sure you have secured the wood piece tightly onto a table or a proper workbench. You can’t be holding the piece at all times as you will need both hands for carving. However, for carving small pieces and shapes, you can hold the wood as you won’t require that much force with the tools.
Step 8: Start Slowly & Make A Rough Texture
To begin, you must cut out as much wood as possible that will give you a basic visual of what you are going to do. Remember, carving is an adventure that requires a certain amount of risk. Don’t be afraid of cutting away too much as long as you don’t come to the sketched design. Start slow and maintain a consistent speed. Do not rush through the process. To maintain focus, you can use headphones and play light music so the external sound doesn’t bother you during the process. If you are more of a quiet worker and can’t focus on music, you can use noise-canceling headphones. I find them very effective.
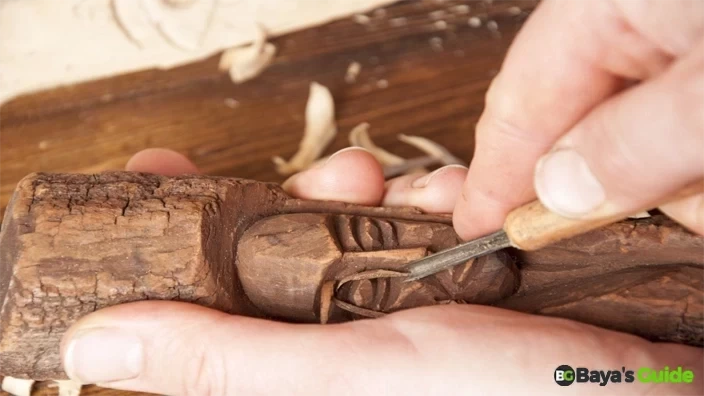
Step 9: Carve The Form
Do not focus on details at first. You will need to carve the rough form of your final design. After you get the basic shape, focus on refining it to the rough form where the naked eye can visualize the shape you are going for. First, focus on the larger pieces of your craft, and as you progress, you can focus more on smaller pieces. Remember, slow and consistent carving will get you the results you want.

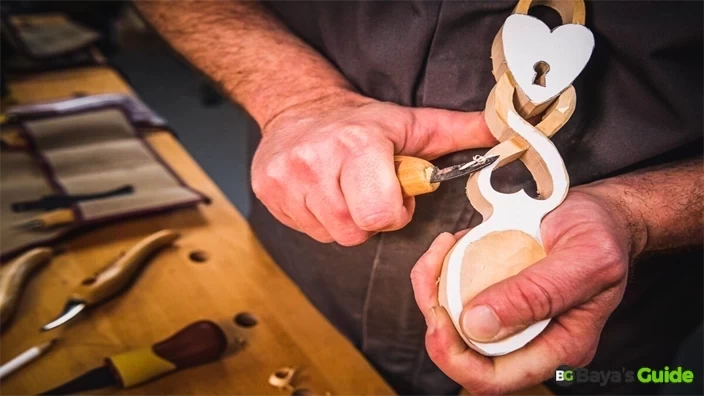
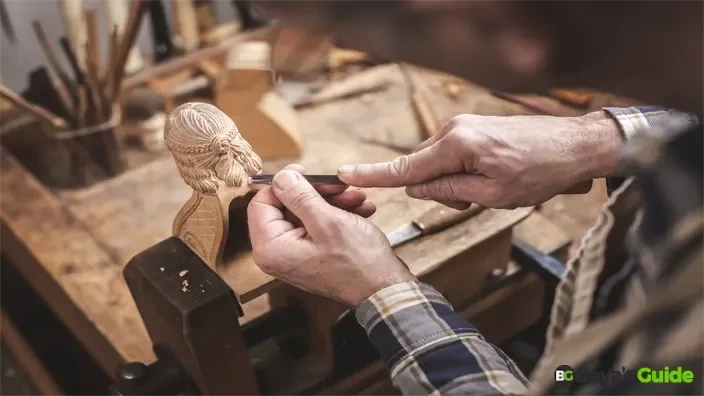
Step 10: Adding Details
Now’s the time to add the details. You will have to switch to smaller tools and be more precise now. There are a few professional tips that can help you through this process. First, you should work on a single area at a time, and when you are finished with it, you should move on to the next one. Complete the larger details first and work on the foreground of the design, and later move to smaller details and background. Also, you must make sure that the tools you are using now are razor-sharp. If you use a dull tool and nick the design, there is no coming back.
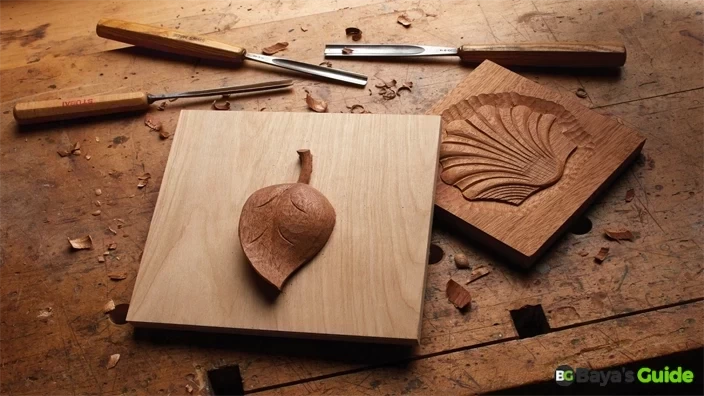
Step 11: Finishing & Polishing
Once you are finished with your design, you need to preserve it. This will require applying a wood finish and polishing the surface to protect it from external factors that could harm its shape or design. You can use paste wax, Danish oil, or spray, whichever is more suited to the wood. These ingredients will allow the natural color of the wood to come out and give you the best results.
Ways To Craft Wood Carve Like A Pro
Ways | Details |
| Exploring Different Wood Carving Styles | Learn the four major whittling styles, namely Whittling, Carving, Round Carving, and Chip Carving, each characterized by their own methods and results. |
| Choosing The Right Kind Of Wood | Select wood based on skill level: Soft for beginners (e.g., Basswood), Hard for pros (e.g., Cherry). |
| Choosing The Right Tools | Make sure to pick up the specialized carving equipment such as knives, gouges, and chisels, making sure they are sharp, easy to grasp, and fit your own style of carving. |
| Ensuring Safety Measures | Ensure safety by honing knives, cutting away from the body, and avoiding carving up against the grain to prevent injuries. |
| Beginning The Practice | Commence with some practice on scrap wood before you get into proper work to feel at home with the tools and techniques involved. |
| Sketching The Design | Do precise work by taking the design onto the surface of the wood before you begin to engrave it. |
| Make Sure The Wood Is Secure & Stable | Affix the wood firmly to the table or workbench before carving in order to keep the tool stable and maintain your safety. |
| Start Slowly & Make A Rough Texture | Start working slowly in order to create a coarse effect and remove the extra wood to show the basic shape. |
| Carve The Form | Develop the rough form of your design, refine it gradually, and visualize the large chunks of the craft. |
| Adding Details | The use of small tools is more accurate, work on one spot at a time and put more emphasis on large details before going to the details. |
| Finishing & Polishing | Enhance and protect your design with a wood finish like paste wax, Danish oil, or spray for a polished look. |
Frequently Asked Questions
How Do Beginners Carve Wood?
Beginners should start with softwood, which is less challenging and much more forgiving. It might seem a bit difficult at first, but as you follow basic cuts and design, you will become more adept at it. Read our above guide for a detailed step-by-step process.
How Do You Start Wood Carving At Home?
First of all, you will need to gather the essential tools and the wood required for the project. Also, make sure you have the mandatory safety equipment and the necessary tools to keep the wood stable.
What Is The Best Way To Carve Wood?
The best way to carve is to use properly sharp tools and to work along the grain. You must not work against the grain as it will ruin the workpiece. Also, ensure safety precautions, designing the sketch beforehand and maintaining proper sharpness of the tool.
What Are The Methods Of Wood Carving?
Four methods in general are used in wood carving. The primary method is called whittling, in which a knife is used to shape small shapes. Other methods are relief, round, and chip carving. I have discussed them in detail above.
Conclusion
Carving is not just about transforming wood; it’s about the passion for achieving perfection and revealing the soul of a piece. With the right approaches and techniques, like the above-mentioned, in addition to relief carving, spoon carving, and more, you will be able to carve out the perfect masterpiece no matter what types of wood you use. In the above guide, I have shared a detailed step-by-step guide that can help you achieve this. Follow the guide strictly to carve your way to perfection. Mastering the art requires patience, practice, and persistence. Each carving tells a story; make sure you can tell yours! toto