Want to upgrade your gift-giving strategy as wrapping your gifts is quite the decorating nightmare? Look nowhere but the art of hamper wrapping. The fact is that a stunning arrangement of delicacies is neatly stowed within a catchy container decorated with ribbons, bows, and a pinch of creativity. It is not just a gift; it is a masterpiece ready to be unveiled. Whether you're celebrating an important milestone, thanking a loved one, or just spreading some joy, knowing how to wrap a hamper will take your gift to the next level of a thoughtful gesture that won't go unrecognized.
Bye to standard gift wrap, hamper wrapping is a skill that makes you create impressive and personalized packages for each present. You can pack artisanal cheeses, decadent chocolates, aromatic teas, gourmet snacks, or anything you want, but how? Here, we'll unravel the mysteries of hamper wrapping, from discovering the ideal container to stylishly filling the contents through the application of certain techniques.
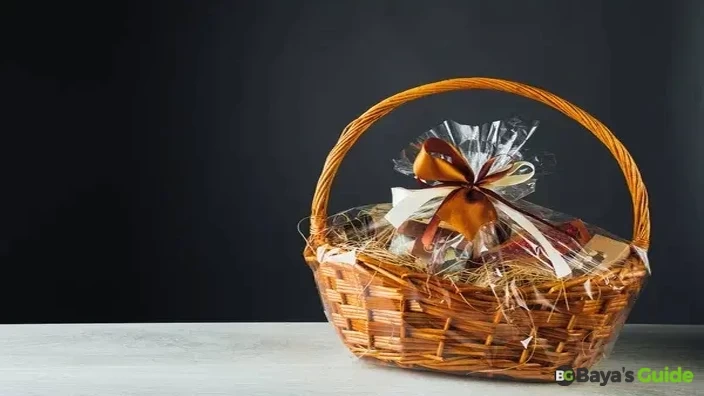
Table of Contents
Basic Items For Wrapping
Some of the very basic things you are required to wrap the gift are easily available at the home store. For example, most often the gifts are cloaked in shoe boxes. Besides, there are some other things you need to wrap a gift easily and beautifully.
- Boxes (as per the size of the gift)
- Woven/Wicker Basket
- Scissors
- Wrapping Paper
- Scotch Tape
- Cellophane
- Stapler & Staples
- Tissue Paper
- Craft Paper
- Crinkle Paper
- Ribbon
- Twist Tie
- Gift Tag/Card
- Mini Ornaments
- Twinkle Light (if you like)
Creating A Memorable Gift Hamper
1- Selecting The Ideal Basket
First, select a standard box-shaped gift or wicker basket after measuring its size as it matches the size of the gift. When you decide on the woven basket's shape, lay tissues and crinkles inside, allowing the padding and colorful base to nestle the souvenir or gift item.
2- Spread Out The Items
After the stage you have beautifully set, you need to lay the gift or different presentable items on it in an aesthetically charming way. Arrange the bigger object in the back wall of the basket and layer the lighter offerings on or in front of the larger gift. Mind it, there should be no vacant room inside the present area that could create hollowness and messiness. To cover the empty portions, you can add more tissues or crinkled papers. Remember, It is not the gift but rather the presentation that enhances the price of your gift and affection of yours, for your loved ones.
3- Twinkle Lights
To do the final finishing of your wicker box, you may also fix the mini twinkling lights if you like, by adding a battery beneath the hamper. First, you need to fix a strand of the battery then arrange the gift objects and shimmering lights on and around the basket- It seems attractively presentable while you are rendering it to your friend.
4- Use Kraft Paper For Gift Basket
Altruistic or gift payers love to make the gift box more cherishing and pleasing by creating a basket base with colorful craft papers. Remember, using kraft paper to create a base for wrapping gift baskets should be designed in a pleasurable and rustic way to present your gifts. Here's how you can do it:
Step 1: Gather Your Material
- Kraft paper rolls
- Scissors
- Tape/adhesive (optional)
- Items to fill the gift basket
Step 2: Measure & Cut The Kraft Paper
- Spread enough kraft paper to cover the bottom of your gift basket and provide some excess for a decorative edge.
- Place your gift basket upside down on the kraft paper.
- Use scissors to cut the paper around the basket, leaving a few extra inches on each side.
Step 3: Fold & Shape The Paper
- Fold the kraft paper edges carefully up and around the sides of the present box. This will surely, create a rustic, crinkled look.
- If necessary, trim the extra paper that may stick out too far.
You Might Also Like: How To Remove Scratches From Glasses
Step 4: Secure The Paper
It is better to secure the extra edges of the sheet down the oval baskets with the bow packing tape or adhesive in the place if desired, but it's not that necessary.
Step 5: Arrange Your Items
- Lay your gift items inside the basket in order on top of the kraft paper base.
- Arrange your gift items nicely within the basket, ensuring they are visible and well-presented.
- Your kraft paper base will not only serve as a functional foundation but also add a rustic, eco-friendly, and aesthetic touch to your gift basket.
Step 6: Add Decorative Elements
- If the gift is going to be rendered to your age fellow or kids especially, you need to use shredded kraft paper or other decorative filler to enhance the presentation.
- You can also tie a ribbon or twine around the basket for an extra touch of charm.
- To add further a festive touch, you may stick a lovely gift tag or a hand-drawn design to brighten your recipient’s day.
That's it! Your gift basket with a kraft paper base is ready to be presented to the recipient. It's a charming and environmentally friendly way to showcase your thoughtful gifts.
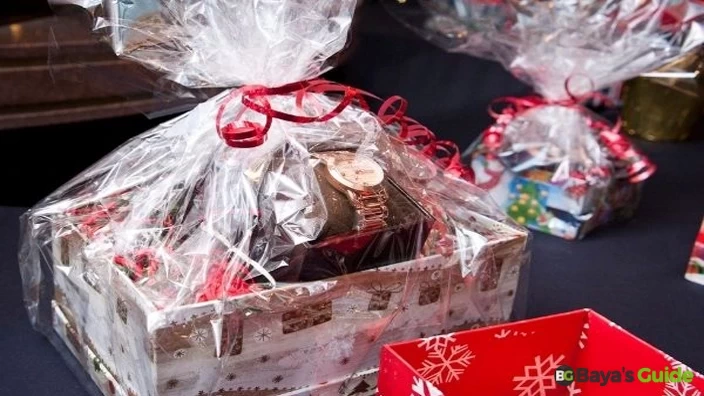
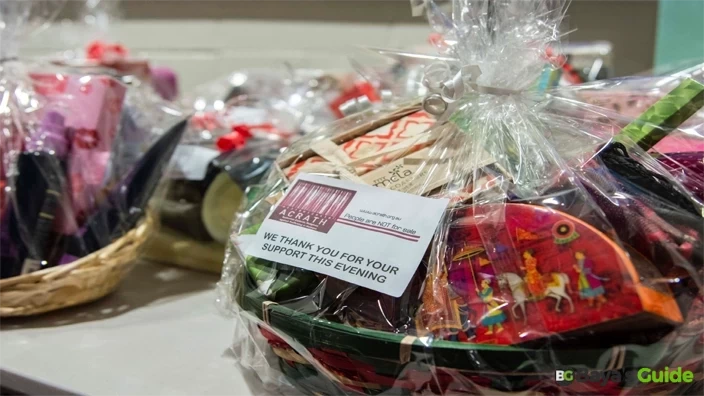
5- Cellophane-Wrapped Gift Box
Presentation matters much more than the gift itself. Decorating a cellophane-wrapped gift basket can add a touch of elegance and personalization to your gift presentation. Here are some ideas for decorating an arranged basket printed cellophane:
Step 1: Ribbon & Bow
- Tie a beautiful ribbon around the top of the cellophane-wrapped basket for an eye-catching focal point. Plus, you may choose a ribbon color that complements the theme or occasion.
- Attach a gift tag or label to the ribbon or cellophane to add a personalized message or the recipient's name. You can use pre-made gift tags or create your own using cardstock or craft paper.
Step 2: Tissue Paper OR Shredded Paper
Place some colorful shredded paper at the bottom of the basket for cushioning and a pop of color and cut the excess paper. Let some of the paper peek out from the top to create a decorative effect.
Note: In addition to pretty cellophane wrapping, use tulle or organza fabric to wrap the basket, as these fabrics add a soft and ethereal look to the presentation.

Step 3: Faux Flowers OR Greenery
So many gift-givers love to add artificial flowers or greenery to the ribbon or bow for a natural and elegant touch but don’t forget to choose the flowers that match the occasion or recipient's preferences.
Step 4: Gift Wrapping Accessories
- Embellish the cellophane Incorporate with other gift-wrapping accessories like stickers, rhinestones, or small ornaments.
- Consider using colored or patterned cellophane wrap to give your basket a unique and stylish appearance. If the basket is really big, you might have to add another layer of cellophane underneath the basket horizontally.
These can be strategically placed to create a decorative pattern or design.
Step 5: Theme-Specific Decorations
If the gift basket has a specific theme, use decorations related to that theme. For example, small bath bombs for a spa theme or miniature food ornaments for a gourmet theme. Moreover, when you have your basket assembled the way you like, you can start wrapping.
Step 6: Personalized Tags OR Labels
- Create personalized tags or labels with the recipient's name or a special message.
- You can design and print these labels at home or order custom tags online.
- Attach small ribbon tassels to the corners of the cellophane for a playful touch.
- Remember to choose decorations that match the occasion and the recipient's taste. With a little creativity, you can turn a cellophane bag into a beautifully adorned gift that will delight the person receiving it.
Frequently Asked Questions
How Do I Make My Hamper Look Good?
For wrapping your gift as per the choice, age, occasion, and temperament of yours and your recipient, you must read and follow the above-written process. If you want to make the theme more elaborate, you may buy a baby basket or you may paste crocheted, and calf-length baby's sock-like shoes on the hamper. In case of having a decorated wedding gift, you may adjacent some flowers with a personalized gift tag that exceeds the charming touch of your hamper.
Can I Wrap Presents In A Hamper?
Wrapping a gift nicely can make it much more special for the person receiving it. I've noticed that when people give gifts without wrapping them, it can take away from the excitement, even if the gift itself is great. So, taking the time to wrap a gift nicely can really make a big difference.
How Many Items Should Be In A Hamper?
The number of items you should include in a hamper, also known as a gift basket, can vary widely depending on your budget, the occasion, and the preferences of the recipient. There is no fixed rule, but here are some guidelines to consider:
- The size of the hamper or basket should give you an idea of how much you can comfortably fit inside.
- Your budget will play a significant role in determining the number of items. You can create a meaningful hamper with just a few carefully selected items or opt for a more extravagant assortment if your budget allows.
- Think about the recipient's tastes and interests. Do they have specific hobbies, favorite foods, or items they would appreciate?
- Consider the occasion for the gift. For example, a romantic Valentine's Day hamper might include a few high-quality items like chocolates, and a handwritten love note, while a Christmas hamper could have a wider variety of festive goodies.
Can I Wrap Hampers Without Plastic?
Plastic can be replaced by other eco-friendly options, such as recycled paper, fabric, or cloth wrapping. They can also be reused. The easiest way is just to put the items in the chosen wrapping material.
After that, pull the edges together and tie them firmly with natural twine or ribbon. Also, you can explore sustainable alternatives like bamboo baskets, wooden crates, or even straw baskets made of woven straw for a nice rustic touch.
Conclusion
In the final analysis, creating a beautifully wrapped hamper is an art that combines creativity, thoughtfulness, and attention to detail. Whether you're preparing a gift for a special occasion or just want to show someone you care, you must follow the steps outlined above in this article.
Always start by selecting a suitable container or basket that matches the theme and size of your hamper. Arrange the items you want to include, keeping in mind the recipient's preferences and the occasion, in an aesthetically pleasing manner, with taller items at the back and smaller ones in the front. Also, if it is shrink-wrapped, you can send them via the post within no time.
Remember that personalization is key to creating a meaningful hamper. Tailor the contents to the recipient's tastes, add a handwritten note, or include small custom touches that show you've put thought into the gift. So, go ahead, wrap that hamper with care, and spread joy to your loved ones on any occasion.