
For sure, collaboration and communication are paramount aspects of success, especially when it comes to virtual meetings and remote work. Fortunately, Microsoft Teams offers a screen-sharing option - a valuable feature to facilitate such interactions. Whether you're working on a project with your remote team or delivering a virtual presentation, screen sharing on Teams allows you to connect, communicate, and achieve the goal with clarity.
In 2024, the number of monthly active users of Microsoft Teams is about 320 million. It sets it among the most popular business communication services in the world. In FY23 Q2, Microsoft said that the number of active daily users in Teams was already 280 million. Likewise, in the same year, it had 270 million active users. These figures make obvious the fact that Microsoft Teams is growing exponentially in terms of both professional and family use. So, you should know how to share screens on Teams on different devices, along with some additional information that's worth knowing.
Table of Contents
- The Best Way Of Sharing Screens on Teams
- Sharing Screen On Teams With Windows Browsers
- Screen Sharing On Microsoft Teams For iPad, iPhone, & Android
- How To Share Your Screen In Microsoft Teams Chat?
- Troubleshooting Microsoft Teams Share Screen Not Working
- Efficient Shortcuts For Screen Sharing Control In Microsoft Teams
- Granting Shared Screen Control In Microsoft Teams
- Requesting Control Of Shared Screen
- Frequently Asked Questions
- Conclusion
The Best Way Of Sharing Screens on Teams
The screen-sharing option on Microsoft Teams is a versatile and valuable feature that can enhance collaboration during meetings or presentations. Here's how to share screens on Microsoft Teams:
Step 1: Access Screen Sharing

- First up, launch a Teams meeting by either planning a meeting in advance or joining an existing one.
- Once you're on the call or have joined a meeting, navigate to the Screen Sharing option at the bottom side of the Teams display.
- Tap this icon to kickstart the screen-sharing process.
Step 2: Choosing Your Sharing Method
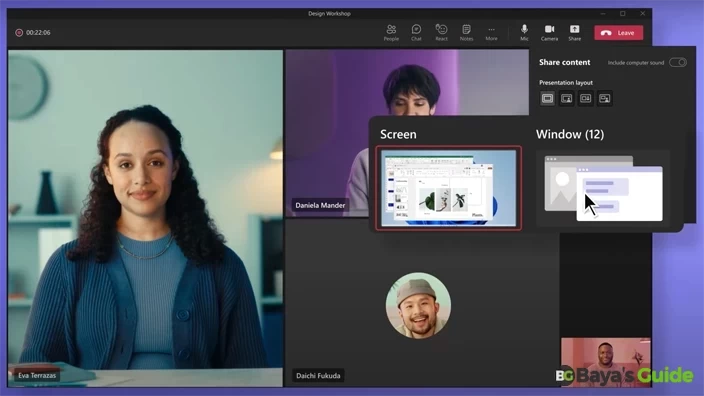
Microsoft Teams offers several flexible options for sharing your screen, adding computer sound, performing any other desktop activity, or even screen recording is possible on teams, depending on your specific needs:
- Share Your Entire Desktop: Opt for this option when you need to display your entire desktop on the computer's screen. It's handy when you have to switch between various applications or show multiple elements during the call. However, be attentive because the method may reveal more than you intend to show.
- Share A Specific Window OR Application: If you have a particular window or application that you want to showcase, select this option. It allows you to focus your presentation on one specific aspect of your screen, maintaining a professional and organized appearance.
- Share A PowerPoint Presentation: Microsoft Teams simplifies the process of presenting a PowerPoint file. You can open your file and share it directly, making it a convenient choice for structured presentations.
- Share A Whiteboard: One of Microsoft Team's standout features is its integration with the Microsoft Whiteboard application. This enables meeting participants to collaboratively draw and come up with a final product on the screen canvas.
Related Content: How To Delete Your TextNow Account
When it's time to finish sharing the screen, simply tap the 'Stop Presenting' option, which you'll find within the Teams interface.
That's a wrap! This way is super easy, right? But what if it isn't working? Don't worry, as this might be due to the OS built into your digital equipment. In case you encounter issues while implementing this way, try the device-specific methods mentioned below.
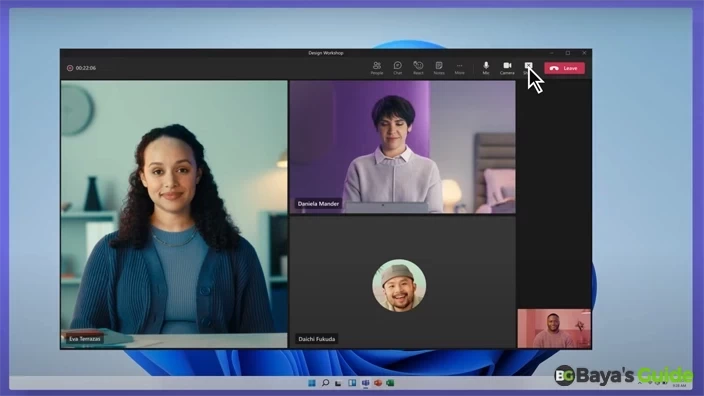
If you're a Windows user, follow the below-outlined steps to utilize the screen-sharing feature on Teams:
- Firstly, locate and click on the screen sharing icon, which is typically located at the bottom of the meeting window.
- Afterward, you will see a list of screen-sharing options. Choose one according to your needs.
- Once you've made your selection, the screen will automatically start sharing with the participants in the call.
- Now, when you want to stop the screen sharing, directly navigate to the call window’s bottom side and click on ‘Stop Sharing’ to do so.
Screen Sharing On Microsoft Teams For iPad, iPhone, & Android
To use Microsoft Teams for screen sharing on your Android phone, iPhone, or iPad during a meeting, follow these steps:
- The first step is to launch the Microsoft Teams application on your pocket device. To proceed further, you must join the meeting where you wish to share the screen seamlessly.
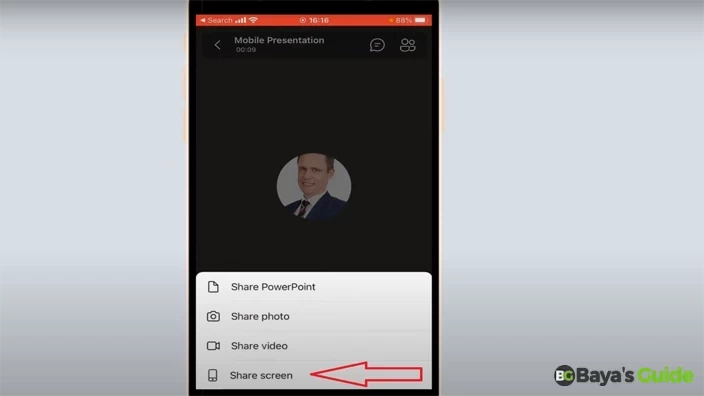
- In the meeting, locate the three dots present on the screen’s bottom to launch the menu. Then, select the 'Share' option to proceed.

- If you own an Android device, next you might encounter a page saying 'Display Over Other Apps'. There, find the Team Application’s icon and give the required permission by clicking the 'Allow Display Over Other Apps' tab.
- Choose the 'Share Screen' option, and if you want to include audio, toggle on the Audio setting.

- Go back to the Microsoft Teams screen by tapping the Back button and selecting 'Start Now' to begin sharing your screen. On iPhone or iPad, you'll find the 'Start Broadcast' option instead.
- During screen sharing, a red border will appear around your device's screen. To stop sharing, simply click on ‘Stop Presenting.’
- This way, you can effectively share your screen with your team in a Microsoft Teams meeting on your phone.
That’s all how to share a screen on Teams on iPad, iPhone, and Android.
If the above methods are not working for any reason, you could try sharing your screen in Microsoft Teams Chat. Here's how to do so:
- Navigate to the top right corner of the chat’s screen and select the screen-sharing icon to begin.
- Then, choose between sharing your entire Screen 1 or selecting specific apps listed under the Window option. These apps might include PowerPoint or Notepad.
- As soon as you select the app or screen, screen sharing will initiate automatically.
- Now, when you are done with sharing your screen’s content with your team members, it’s time to stop sharing the screen. This can be simply done by clicking on 'Stop Presenting' in the upper toolbar.
If none of the above-mentioned ways are working, there might be an issue related to preferred settings. For your ease, we have given below a few key steps to fix the Microsoft Teams share screen not working:
- To begin with, launch the Admin Center of Microsoft Teams on your browser.
- Navigate to the 'Meetings' section in the left-hand menu to access additional options.
- Choose 'Meeting Policies' from the available options.
- Locate and open the 'Global' policy for editing.
- Within the policy settings, locate the 'Content sharing' option.
- Opt to select 'Entire screen' as the preferred mode for screen sharing.
- Finally, scroll down and save the changes by clicking the 'Save' button.
Efficient Shortcuts For Screen Sharing Control In Microsoft Teams
The shortcut Ctrl + Shift + E is used to start screen sharing on a Teams meeting or call. This shortcut will allow you to toggle the screen-sharing feature on and off in Teams quickly.
Granting Shared Screen Control In Microsoft Teams
As far, as I have just mentioned ways on how to share screens on Teams to see everything on your screen. But what if you want to give shared control of the screen to the members of your team? Here's how to grant shared screen control:
- At the screen's top side, find the content-sharing menu to get started.
- Then, hover over the menu and choose the team member to whom you want to give control of the screen.
- Microsoft Teams will then notify the selected person that you've given them control. They can now make selections, edits, and changes to the shared screen as needed.
- If you want to regain control and finish sharing, simply click the 'Take-Back Control' button you can find in the bar.
Requesting Control Of Shared Screen
Here's how to request control of shared screens in Microsoft Teams:
- Open the Microsoft Teams application and either join a meeting or sign in if necessary.
- Wait patiently for one of the meeting members to start sharing their device’s screen.
- When someone shares their screen, locate the 'Request Control' button and click on it to request control over their screen.
- A popup prompt will appear, In this prompt, choose the 'Request' option to confirm your request for screen control. Here you can select open system preferences as well.
- Once you've finished your interaction with the shared screen, click the 'Stop Control' button to revoke your control and return control to the original presenter.
Frequently Asked Questions
Screen-sharing functions in Teams might not work due to several reasons. Some common ones include an unstable internet connection, an outdated browser or app version, or a lack of the necessary permissions to share your screen,
There are several ways and more options to share your screen in Microsoft Teams, depending on the operating system you're using.
- Begin your meeting in Microsoft Teams.
- Select the 'Share Content’ tab, which you can find by navigating the screen’s upper-right corner.
- Choose your preferred Presenter mode.
- Customize with a background image if desired.
- Select the screen or window to share and begin your presentation.
There are several ways to share your screen in Microsoft Teams, depending on the operating system you're using. However, we have also mentioned a general way for your ease. If this doesn't work, move on to device-specific methods outlined above.
Can Attendants In The Meeting See My Face While Screen Sharing?
Sharing a screen on Teams lets others view your screen content, but they won't see your face unless you're also using your webcam. You can enable your webcam separately while sharing your screen to show your face alongside the shared content.
Conclusion
To wrap it all up, sharing your screen on Microsoft Teams is a valuable feature that can enhance your online meetings and collaboration efforts. In this blog, we've explored the step-by-step process of sharing your screen effectively. We also mentioned device-specific ways on how to share a screen on teams on Mac, iPad, iPhone, and Android. By following these simple instructions, you can effortlessly share your presentations, documents, or any other content with your team members or clients. The result? Engaging and productive virtual team meetings. Do you like the above article? Share your valuable thoughts in the comments section!